
Coworkers: Building Custom Automation Workflows
The "Coworkers" section within Wexa.ai allows you to create and manage custom automation workflows. This section serves as your central hub for designing and deploying workflows tailored to your specific needs.
Accessing Coworkers:
Locate the "Coworkers" button within the Wexa.ai navigation menu. Clicking this button will display a dedicated page for managing your existing coworkers.
Creating a Coworker:
- If you haven't created any coworkers yet, the Coworkers page will display a "Create Coworker" button. Click on this button to initiate the process.
Coworker Definition:
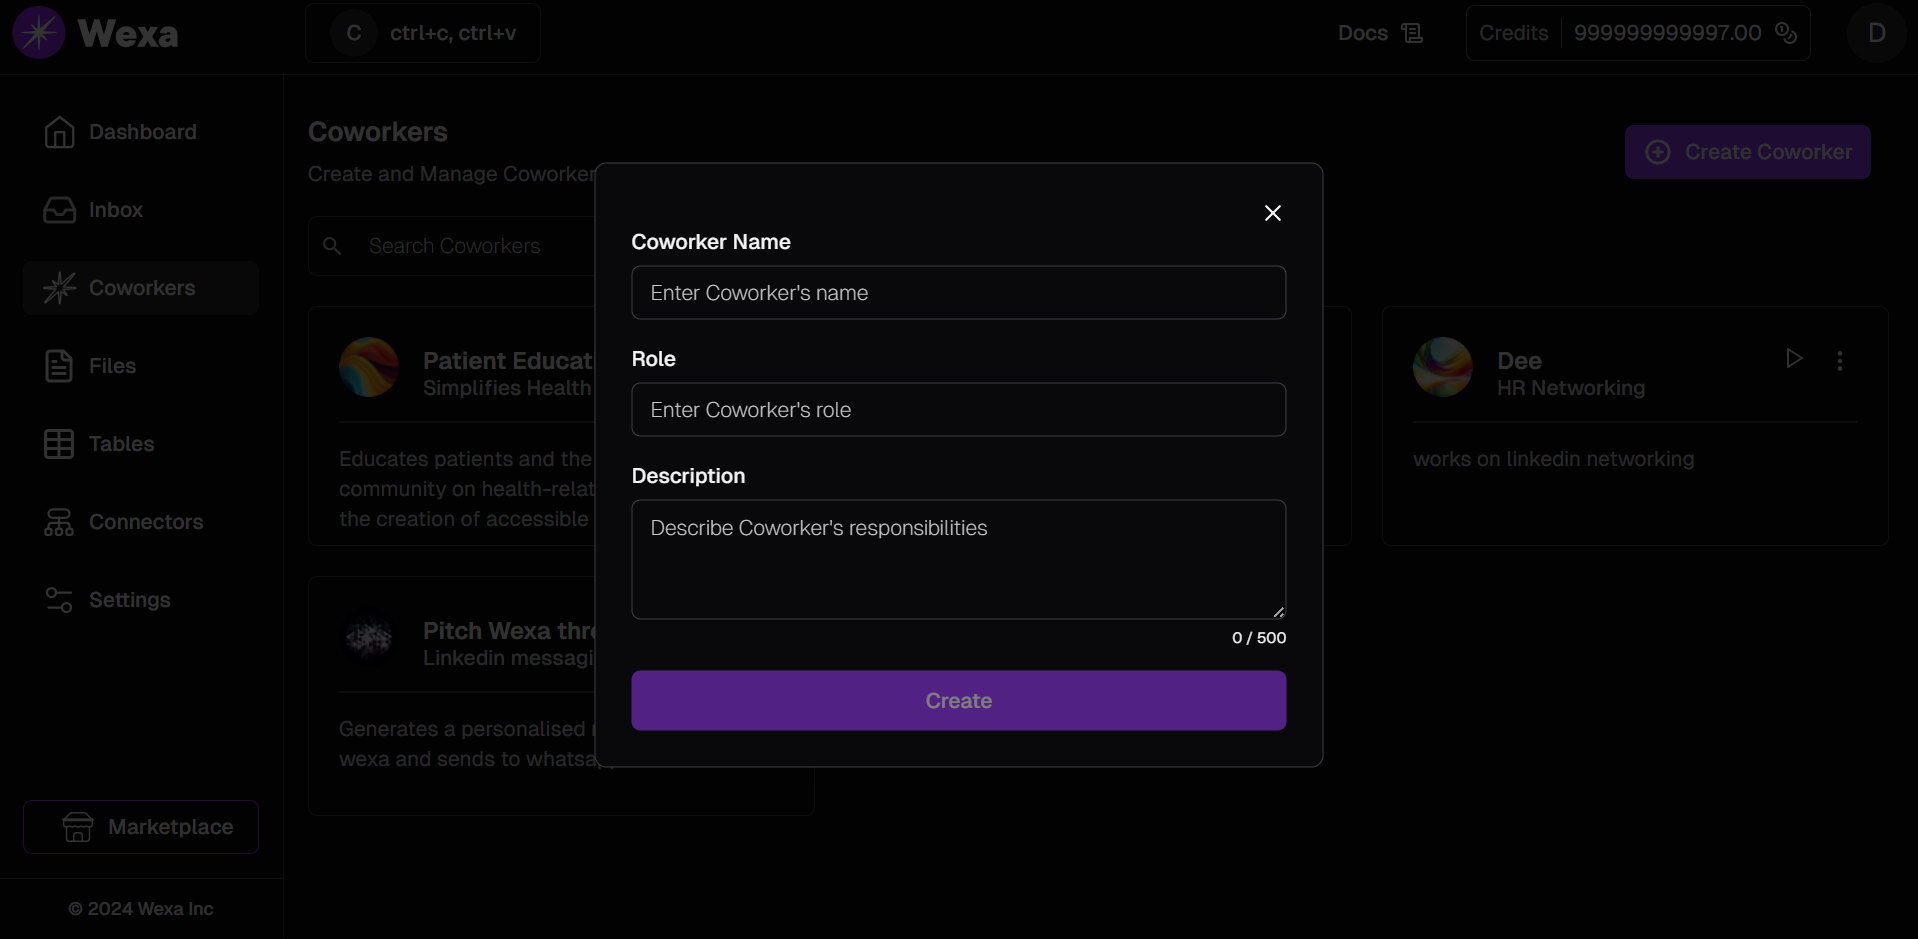
A pop-up window will appear, prompting you to provide details for your new coworker:
- Name: Choose a clear and descriptive name that reflects the coworker's function (e.g., processCustomerOrder, generateSalesReport).
- Role: Briefly describe the coworker's overall role within your automation process.
Description (Optional): Add a more detailed explanation of the coworker's purpose and the tasks it will perform.
Building the Coworker with Agents:
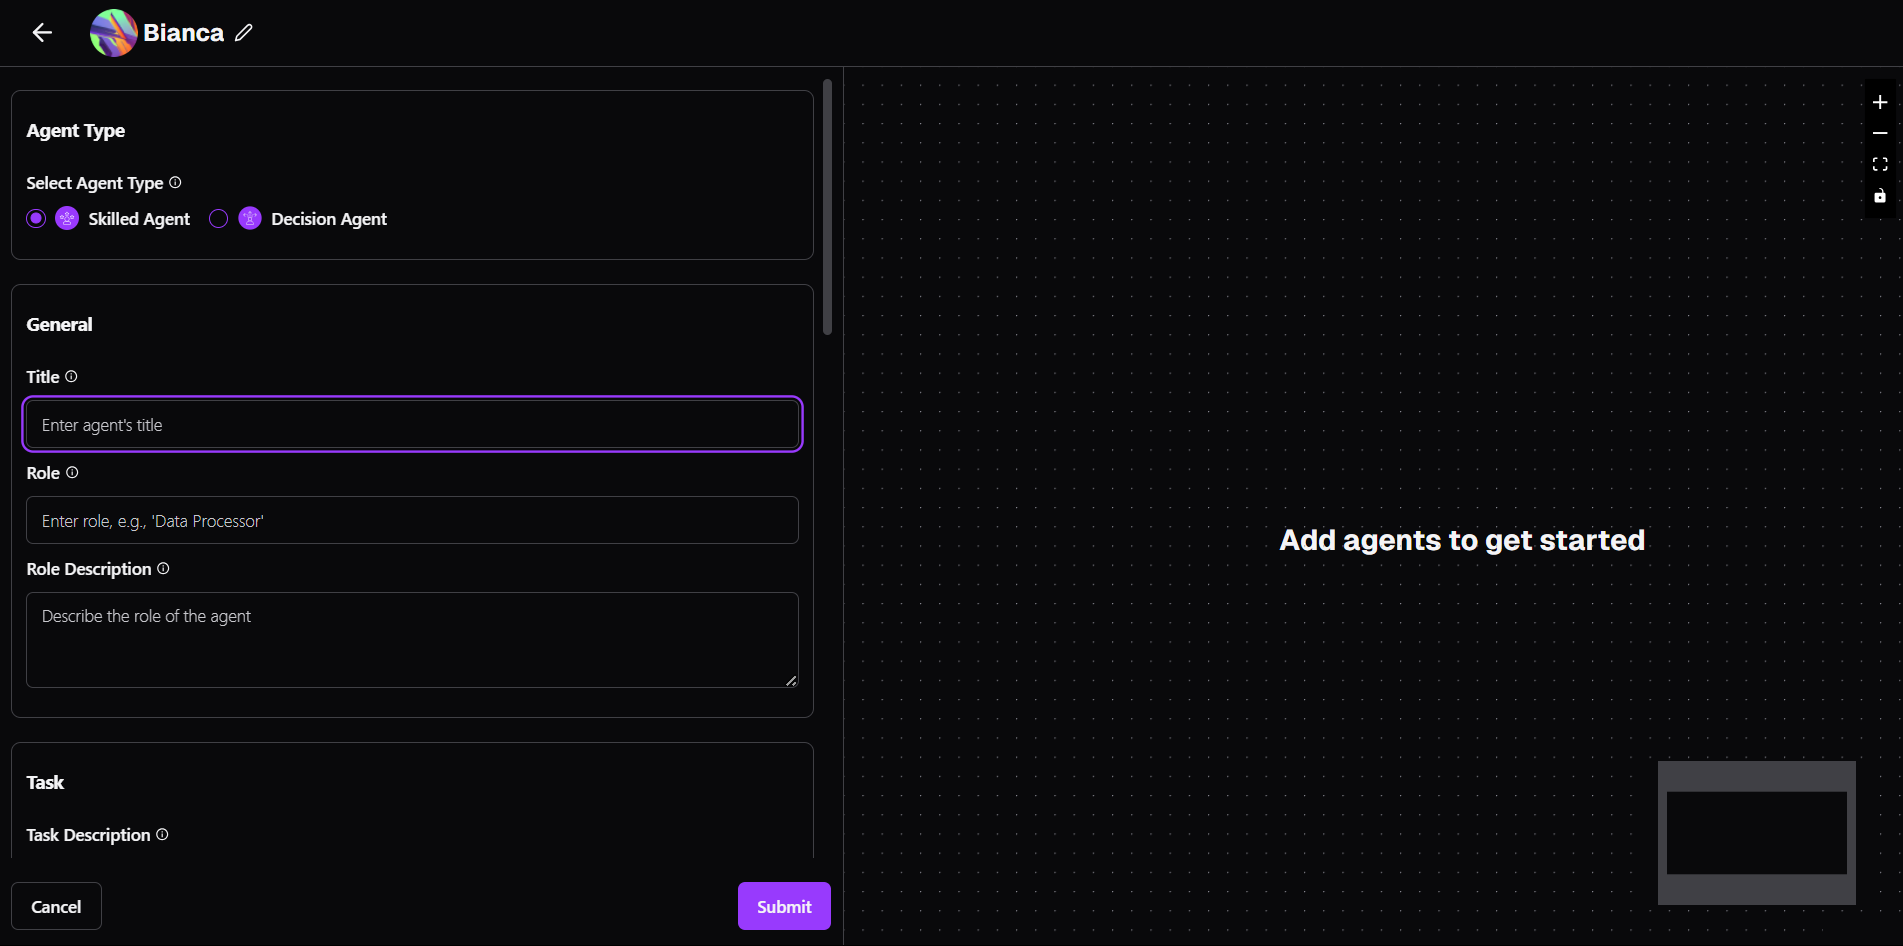
Agents are the building blocks of your coworker, each handling a specific task within the overall workflow. Here's what you can expect within the agent creation form:
- Agent Type: Select the type of agent you'll be creating based on the functionalities you require (e.g., Decision Making Agent, Skilled Agent).
- Agent Details/General: Provide details for the agent, including a title, role description.
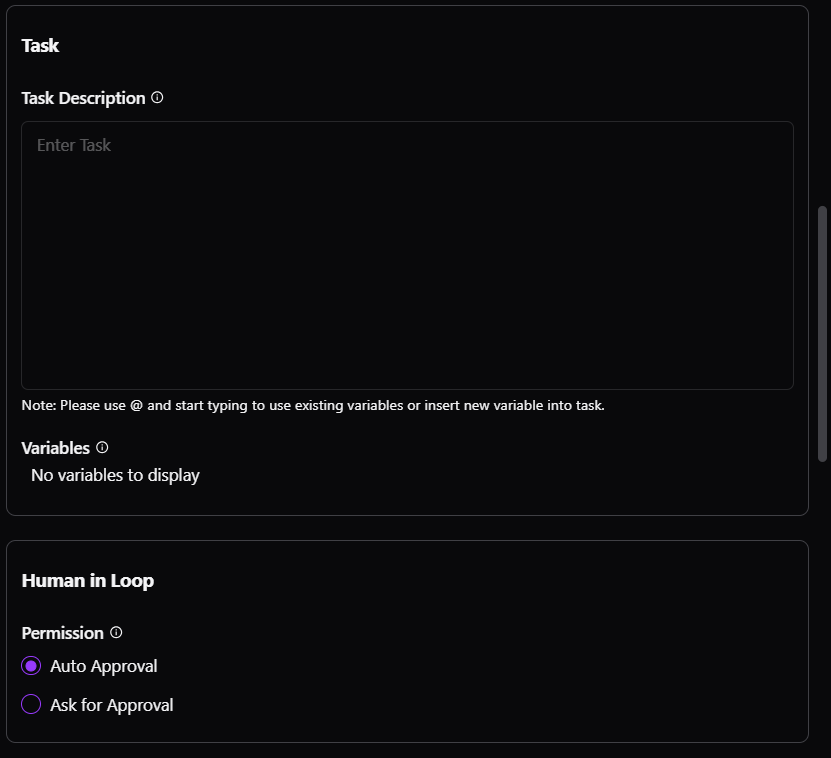
- Task: Define the main task for the agent in this field. Include any specific instructions or scripts the agent needs to follow. This field supports extensive text for complex descriptions.
- Variables- These are the new variables that are used in the task description. Please provide label and description for the variables. Use @ and start typing to use existing variables or insert new variable into task. After mentioning the variable, please fill the profile of the variable with label for the profile and Description for the profile.
- Human in Loop: This is the area which keeps you in execution and decision making. Select the approval mode for this agent's tasks. 'Auto Approve' allows the agent to execute tasks automatically without further oversight. 'Ask for Approval' requires each task to be manually approved, providing an additional layer of control and review. Choose based on your need for automation versus control.
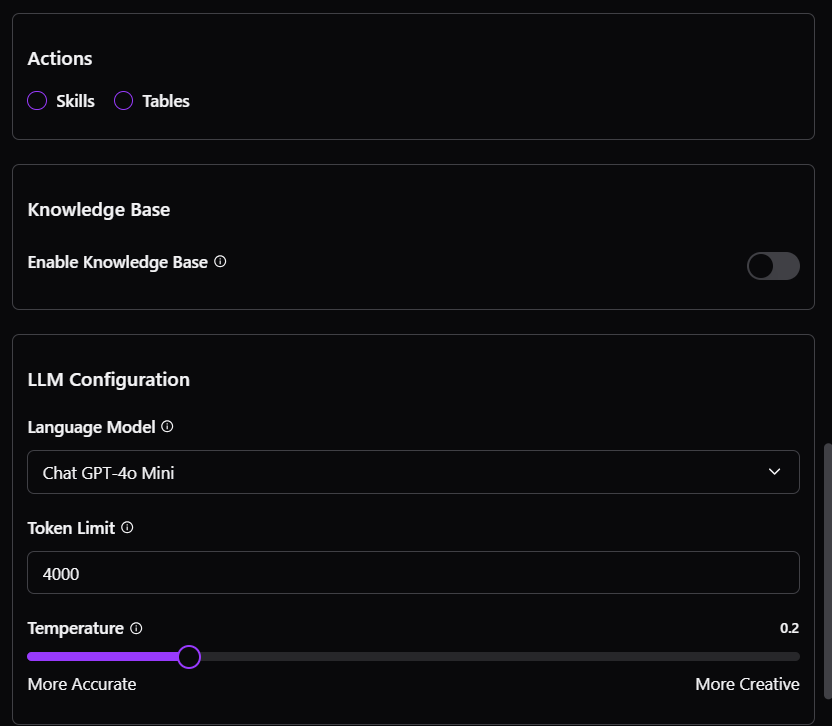
- Actions: you can choose the action you want this agent to have from the option of Skills or Table.
- Skills: Assign skills to the agent. These skills are essentially API permissions that grant the agent access to perform specific actions within the configured connectors.
- A window will display all the connectors you've configured. If the desired connector isn't present, you can use the "Add Connector" button to navigate to the Marketplace (if applicable) and either configure an existing connector or request a new one.
- Table: Pick one of the available tables for the agent to operate.
- Knowledge Base (Optional): Enable or disable the use of a knowledge base for this agent. When enabled, you will be prompted to enter specific tags. These tags connect the agent to a knowledge base, using embeddings to enhance prompt handling and response precision
- Language Model & Token Limit: Select a language model and a maximum token limit for the agent. These parameters influence information processing and resource utilization.
- Temperature Control: Adjust the agent's temperature using a slider or designated buttons. This setting influences the balance between factual accuracy and creative text generation during execution.
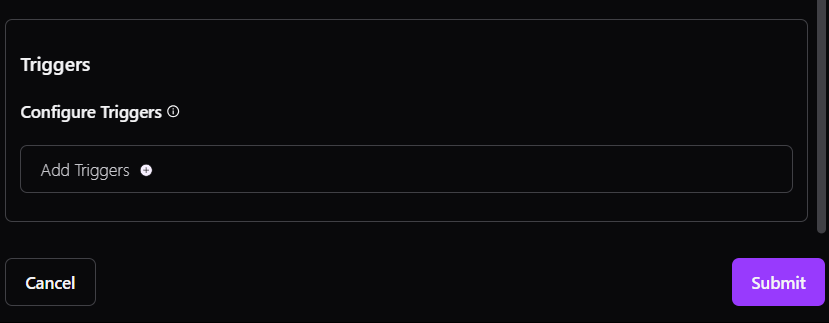
- Triggers: Define triggers for the agent. These are events that will initiate the agent's workflow. You can add multiple triggers to your coworker for varied responses to different situations. Triggers automate the next steps. When a task is finished, they automatically start the following task, creating a seamless workflow. Dynamic data is inserted into the process using placeholders.

Creating Multi-Step Workflows:
You can create multiple agents within a single coworker, essentially building a multi-step workflow. Each agent acts as a step in the process, leveraging its assigned skills (connector permissions) to perform specific tasks. By linking these agents together with triggers, you can design complex automation sequences.
Completing Your Coworker:
Once you've finished defining and configuring all the necessary agents within your coworker, submit the form to finalize its creation.
With your coworker built and deployed, you're now equipped to automate specific tasks or processes within your workflow. Remember, coworkers can be designed for various functions, and the specific configuration steps might vary depending on the desired functionality.